Dec 29, 2011


This is a huge family favorite that we always make a Christmas time and here and there throughout the year. I LOVE them! Have you seen the Chocolate Chip Paradise Pie at Chili’s? Yep that’s magic cookie bars with ice cream on top! Yummo How about making Chocolate Chip Paradise Pie for the fraction of the price? This is a super simple recipe that anyone can make regardless of your cooking level! Give it a try and see what you think? If you are feeling extra naughty slap on some vanilla ice cream, caramel sauce, and chocolate sauce onto your bars for paradise pie!

Ingredients:

  • 1/2 cup butter or margarine, melted
  • 1 1/2 cups graham cracker crumbs
  • 1 (14 ounce) can EAGLE BRAND® Sweetened Condensed Milk
  • 2 cups semisweet chocolate morsels
  • 1 1/3 cups flaked coconut
  • 1 cup chopped nuts
Directions:

  1. Heat oven to 350 degrees F (325 degrees for glass dish). Coat 13x9-inch baking pan with no-stick cooking spray.
  2. Combine graham cracker crumbs and butter. Press into bottom of prepared pan. Pour sweetened condensed milk evenly over crumb mixture. Layer evenly with chocolate chips, coconut and nuts. Press down firmly with a fork.
  3. Bake 25 minutes or until lightly browned. Cool. Cut into bars or diamonds. Store covered at room temperature.
Recipe Source

Chocolate Chip Paradise Pie at Chili’s From the Chili's Website


Check Out Our Online Recipe Book: www.CafeChatterbox.com

Dec 21, 2011


I don’t like to refer to myself as cheap so I will say I am frugal. I hate spending big bucks on things we use every day.  I love to have foaming hand soap in the bathroom, but I hate to pay refill prices. In the kitchen I have the Lysol No-Touch Hand Soap System which I refill myself also. I decided to find a way to refill my foaming hand soap dispenser that I purchased at Target. I paid around $2.50 for the initial foaming soap dispenser and of course it came filled, but I wasn’t going to pay the money they wanted to refill it. After 2 minutes of research I found a “recipe” and instructions on how to make my own. I walked to the bathroom with a measuring spoon, cup, and dish soap and 1 minute later I had foaming soap! Simple Simple Simple! Cheap! If you want something that smells better than dish soup you can use Bath and Body Works Shower Gel or even the Body Shop Shower Gel. Whatever makes you happy! I made pumpkin spice soap today using the Body Shop Shower Gel. 


You will need:
  • 1 empty foaming hand spa dispenser
  • 3 TBS Clear (very important) liquid soap (body wash, hand soap, dish washing soap, shampoo)
  • 2/3 Cup water
Directions:

1.      Add the 3 TBS of clear liquid soap to your foaming hand soap dispenser
2.     Add the 2/3 Cup of water
3.     Close up your your foaming hand soap dispenser and gently move the soap and water around so that they will mix well. Do not shake! Gently combine the water and the soap.
4.     Test your foaming hand soap dispenser to insure it works
5.     Enjoy!


    Check Out Our Online Recipe Book: www.CafeChatterbox.com

    Dec 20, 2011


    I have heard over and over just how great buttermilk is! “OH NICOLE you have to try buttermilk pie.” Finally I made a buttermilk pie and I must say it was pretty good. I will admit I do NOT like anything eggy! For instance I do not like frittata, omelets, bread pudding or eggs in general. To me this was on the border line of almost too eggy! Don’t get me wrong I loved it! The flavor was incredible. It comes together quick and easy and served warm its heaven. Severed hot it’s lethal. Let it cool!!  This is a keeper!

    Ingredients:
    • 1/2 cup butter or 1/2 cup margarine , melted
    • 1 1/2 cups sugar
    • 3 tablespoons flour
    • eggs , beaten
    • 1 pinch salt
    • 1 teaspoon vanilla
    • 1 cup buttermilk
    • 1 deep dish pie shell (I used Pillsbury)

    Directions:
    1. Preheat oven to 400°F.
    2. Beat the butter and sugar together until light.
    3. Add the eggs and beat; then beat in vanilla.
    4. Sift the dry ingredients together and add to the batter alternatively with the buttermilk; beat until smooth.
    5. Pour into a deep dish pie shell and bake at 400F for 10 minutes, reduce heat to 350F and bake for 50-60 additional minutes.
    6. Pie should turn a nice golden brown and a knife inserted should come out clean.
    7. I think it is absolutely best when it is just still warm. 
    Original Recipe Source

    Check Out Our Online Recipe Book: www.CafeChatterbox.com

    Dec 17, 2011


    I love sweet potatoes and I love sweet potato pie, but I had never made a sweet potato pie myself. After Thanksgiving I had a ton of sweet potatoes left over. I kind of went sweet potato crazy at the store the night before Thanksgiving because they had sweet potatoes 6 pounds for $1! I ended up with 12 pounds… my husband looked at me like I was losing my mind when I started loaded up the cart with them, but I had a plan… kind of….

    After looking for just the right sweet potato pie recipe I found this one and boy I am happy I did! It turned out fantastic! Just perfect!! I am guilty of using a Pillsbury pie crust because I didn’t have time to make one from scratch, but everything else was all me.  If you like sweet potato pie then this is a recipe for you!

    Ingredients:


    • 1/3 cup butter or 1/3 cup margarine , softened
    • 1/2 cup sugar
    • eggs , lightly beaten
    • 3/4 cup evaporated milk
    • 2 cups mashed sweet potatoes
    • 1 teaspoon vanilla extract
    • 1/2 teaspoon ground cinnamon
    • 1/2 teaspoon ground nutmeg
    • 1/4 teaspoon salt
    • 9 inches unbaked pie shells

    Directions:
    1. In a mixing bowl, cream butter and sugar.
    2. Add eggs; mix well.
    3. Add milk, sweet potatoes, vanilla, cinnamon, nutmeg, and salt; mix well.
    4. Pour into pie shell.
    5. Bake at 425 degrees for 15 minutes.
    6. Reduce heat to 350 degrees; bake 35-40 minutes longer or until pie tests done.
    7. Cool; Store in refrigerator or eat warm! It’s fantastic warm!


    Check Out Our Online Recipe Book: www.CafeChatterbox.com

    Dec 14, 2011


    We are finally moved in, but that doesn’t mean we are settled in. It is amazing how much stuff you have that you don’t need, and it’s amazing how much stuff I have already donated.  Here is a picture of what the entrance of our house looked like a few days after we moved in. Stuff was everywhere!

    As you can see below we haven’t progressed a lot! We are in the middle of finals right now, but I am praying that everything will be done this weekend, so that we can decorate for Christmas. As you can see in the picture below we are progressing just at a slow place. The two boxes and laundry basket by the water and cat litter are being donated so that will remove a big mess. My husband decided to stock up on soda last night so you will see a large display of soda and pretty much everything else just needs to be put away. See the gigantic box of cleaning supplies.... I have no idea what the heck to do with all of that UGH!


    If you are asking yourself right now where is all of their furniture you are in luck because I have an answer and the answer is….  We threw it all away! HA! Yes we will be getting new furniture after the holidays because our furniture had seen its better days! So as we can we will be refilling the house!

    Happy Wordless Wednesday!!


    Check Out Our Online Recipe Book: www.CafeChatterbox.com

    Dec 9, 2011


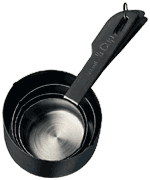
    I found this on Allrecipes.com and thought I would share it. I cut recipes in half all the time or can't find a measuring cup or spoon that I need. I never want to take the time to figure out the conversions or what else I can use so I consult this really great chart! Also Allrecipes.com is a great website to find a lot of wonderful recipes. Here is the direct link.


    measuring cups

    Commonly Used Measurements and Equivalents

    By:
    Allrecipes Staff
    How much is a peck, a pint, or a pinch?


    1/2 teaspoon

    = 30 drops
    1 teaspoon

    = 1/3 tablespoon or 60 drops
    3 teaspoons

    = 1 tablespoon or 1/2 fluid ounce
    1/2 tablespoon

    = 1 1/2 teaspoons
    1 tablespoon

    = 3 teaspoons or 1/2 fluid ounce
    2 tablespoons

    = 1/8 cup or 1 fluid ounce
    3 tablespoons


    = 1 1/2 fluid ounce or 1 jigger
    4 tablespoons

    = 1/4 cup or 2 fluid ounces
    5 1/3 tablespoons

    = 1/3 cup or 5 tablespoons + 1 teaspoon
    8 tablespoons

    = 1/2 cup or 4 fluid ounces
    10 2/3 tablespoons

    = 2/3 cup or 10 tablespoons + 2 teaspoons
    12 tablespoons

    = 3/4 cup or 6 fluid ounces
    16 tablespoons

    = 1 cup or 8 fluid ounces or 1/2 pint
    1/8 cup

    = 2 tablespoons or 1 fluid ounce
    1/4 cup

    = 4 tablespoons or 2 fluid ounces
    1/3 cup

    = 5 tablespoons + 1 teaspoon
    3/8 cup

    = 1/4 cup + 2 tablespoons
    1/2 cup

    = 8 tablespoons or 4 fluid ounces
    2/3 cup

    = 10 tablespoons + 2 teaspoons
    5/8 cup

    = 1/2 cup + 2 tablespoons
    3/4 cup

    = 12 tablespoons or 6 fluid ounces
    7/8 cup

    = 3/4 cup + 2 tablespoons
    1 cup

    = 16 tablespoons or 1/2 pint or 8 fluid ounces
    2 cups

    = 1 pint or 16 fluid ounces
    1 pint

    = 2 cups or 16 fluid ounces
    1 quart

    = 2 pints or 4 cups or 32 fluid ounces
    1 gallon

    = 4 quarts or 8 pints or 16 cups or 128 fluid ounces

    Check Out Our Online Recipe Book: www.CafeChatterbox.com

    Dec 6, 2011

    I found this article by Emily Hsieh, of Shine staff to be very interesting, and it explains why sometimes I have to re-wash things in my dishwasher. My husband loads the dishwasher just like hers. I guess I never thought about a proper technique for loading my dishwasher. Original article link.

    My husband and I are divided when it comes to loading the dishwasher. My methodology is aimed at space efficiency: I line up all the plates on one side, all the cups on the other, and anything random/big in the middle. His technique, or lack of, is completely haphazard—he just throws things in the machine in the first empty spot he sees (which means only about half as many dishes fit). And as it turns out, as was reported in The New York Times, there is actually a science to this, and my approach could use some finessing too. Here are some pointers from the Consumer Reports Home and Garden blog to help your dishwasher perform at its best, and to prevent your dishes from chipping:

    1.      Load large items at the sides and back of the dishwasher, so that they don't block water and detergent from reaching other dishes.
    2.     Place the dirtier side of dishes toward the center of the machine to provide more exposure to the spray. Don’t let dishes or utensils nest, or rest side by side, which can prevent water from reaching all surfaces.
    3.     Use the top rack for plastic and delicate items that are dishwasher safe.
    4.     Rest glassware on prongs to prevent breakage. And to prevent chipping, make sure that china, crystal, and stemware don’t touch other items. Don’t machine-wash brass, bronze, cast iron, disposable plastics, gold-colored flatware, gold-leaf china, hollow-handle knives, pewter, tin, or anything made of wood or with a wood handle. 
    5.     Load silverware with handles down but place knives with the handles up. If your dishwasher has an open basket, mix spoons, forks, and knives to prevent them from sticking together.
    6.     Place items with baked-on food facedown and toward the sprayer in the bottom rack.

    Check Out Our Online Recipe Book: www.CafeChatterbox.com

    Dec 5, 2011

    I am always looking for ways to clean that don't cost too much, and that are better for my family. I love how bleach cleans, but it doesn't seem to like me. I sneeze like crazy using it. Molly passed this website on to me, and I wanted to share it with you. 1001 Uses for White Distilled Vinegar

    My favorite tips is:
    Deodorize the garbage disposal by pouring in 1/2 cup baking soda and 1/2 cup hot white distilled vinegar. Let sit for 5 minutes then run hot water down the disposal.


    Check Out Our Online Recipe Book: www.CafeChatterbox.com

    Dec 4, 2011


    We are notorious for letting bread get stale. We don’t each a lot of sandwich bread. We always have it, but it doesn’t always get eaten. My husband eats it when he makes a peanut butter sandwich, but that is pretty much it. Typically we eat everything else on other types of bread. I always feel guilty when I have a bag of bread that goes stale. I hate wasting food, and worse money.

    I decided that wasn’t happening anymore we were spending too much money on things we were not eating. I wasn’t going to stop buying the bread because my husband likes to have it when the PB is calling his name. I had to think of alternative ways of preserving it, and I have. I often take the bread and dry it out beyond belief. It’s brick hard when I am done with it. A 400 degree oven for 15+ minutes can work wonders.

    I make:
    • Bread crumbs (They are much better than anything you can buy in a store)
    • Stuffing (Any turkey would love this stuffing)
    • Croutons (A few spices, olive oil, garlic powder they become restaurant quality)
    • Toast (Sure why not?)
    You can keep each one of these items for weeks with an air tight container. Why waste food you have already paid for, then turn around and pay for it again in the store in a new form like bread crumbs.


    Check Out Our Online Recipe Book: www.CafeChatterbox.com

    Dec 3, 2011


    This is a great video! I would love to be able to fold my laundry this fast, but to be honest I can't even follow this guy because he is moving so fast, but I do love how these t-shirts turn out! Give it a try and see if you can follow this guy! You could end up being a laundry speed demon!


    Check Out Our Online Recipe Book: www.CafeChatterbox.com

    Blue Star Applicances and Ranges

    Enter your email address:

    Delivered by FeedBurner

    Popular Posts

    Blog Archive