Jul 7, 2010

This is such a quick and easy way to make corn on the cob. We had this with our Fourth of July dinner. I was able to toss it in the microwave and have it ready just in time for dinner. I was very impressed with the flavor, how easy it was too cook, and the overall simplicity of the whole process. It’s tender, juicy, and flavorful. Who needs butter when you can cook it like this? Can I tell you how much I love Kittencal! Her recipes rock!!

Ingredients

  • 3 ears of corn (do not remove the husks)
  • 2 damp paper towels (use a double paper towel)
  • Butter if needed
  • salt if needed
Directions

  1. Cut off the floppy silks on top of the husks (do not remove the husk).
  2. Wet both papers towels and squeeze out the water then wrap each husk well with double layer of damp paper towels.
  3. Place the corn/s around the outside of the turntable.
  4. Microwave for 10 (add or subtract 2.5mins per ear) minutes on HIGH, turn the corn onto it's otherside and continue to cook for another 10 minutes (feel the ear to be sure they are very hot).
  5. Using a towel carefully remove from microwave and let sit for 5 minutes before removing the husks and silks, the silks will slide off like magic (BE CAREFUL these are very hot!).
  6. Serve with butter and salt.


Bookmark and Share

Jul 6, 2010

I don’t even know where to start with this recipe other than the fact that I am in LOVE! This was my first experience eating and making Israeli couscous. At least in my neck of the woods finding Israeli couscous is next to impossible at any regular grocery store. We have a Middle Eastern grocery store that I go to all the time, not only are their prices cheaper, but you can find things there that you can’t find in many other stores. I love texture! When using Israeli couscous you get the texture of the little balls, but they really are just the background to this recipe. The dressing is fantastic also. Something about tomatoes and mozzarella cheese just mingle so well. I had a recipe picked out when I decided to make this, but it wasn’t exactly what I wanted. Instead this recipe was born. I allowed the dressing to refrigerate for about 6 hours without the couscous, then I added the couscous before bed and refrigerated overnight. It came out perfect! Refrigerating for 6 hours is not necessary just refrigerate long enough to chill it.


Ingredients

  • 2 cups diced tomatoes 
  • 1 cup diced fresh mozzarella cheese
  • 2 teaspoons extra virgin olive oil
  • 2 tablespoons minced onion
  • 1/4 teaspoon lemon juice
  • 1/2 teaspoon salt
  • 1/4 teaspoon fresh ground black pepper
  • 1/2 garlic clove, crushed and minced
  • 1 1/4 cups water
  • 1 cup uncooked Israeli couscous
  • 2 tablespoons fresh parsley
Directions:

  1. In a bowl combine the tomato, mozzarella, onion, olive oil, lemon juice, salt, pepper, and garlic, toss well then refrigerate, covered, to marinate for at least 30 minutes.
  2. In a pot bring the water to a boil and gradually stir in the couscous; remove from the stove, cover, and set aside for 5-10 minutes. Drain off extra water.
  3. With a fork, fluff the couscous then let cool in the refrigerator
  4. Add the cooled couscous and to the tomato mixture in the bowl and toss.


Bookmark and Share

Jul 5, 2010

This is a simple recipe that comes out like fried french fries, but with less fat, and less work. I really like how simple it is, and the flavor is great too. To my surprise, the fries came out nice and crunchy, but fluffy inside. I was a little afraid of how the parmesan cheese would taste on the fries. I thought the cheese would be overwhelming, but to be honest you don’t really notice the cheese at all. The flavors mingle well. I would say to watch your cooking time. It really will depend on the thickness of your fries. I use a veggie cutter, so my fries for the most part are uniform.

Ingredients

  • 2 large baking potatoes, peeled and cut into thin strips
  • 1 tablespoon grated parmesan cheese
  • 1 tablespoon oil
  • 1/4 teaspoon salt
  • 1/4 teaspoon garlic powder
  • 1/4 teaspoon onion powder
  • 1/4 teaspoon paprika
  • 1/4 teaspoon black pepper
 
 
Directions

  1. Heat oven to 450°.
  2. Cook on parchment paper, and spray it with cooking spray.
  3. Combine all dry ingredients and combine with potatoes, tossing to coat.
  4. Drizzle with oil, tossing again to coat.
  5. Arrange potatoes in a single layer on baking sheet and bake for 35 minutes or until golden brown.


Bookmark and Share

Jun 26, 2010

I could have continued to eat these like an oinker all night long if we had any left. They went very quickly. These fries have a nice spice to them, and are nice and crispy if you cook them long enough. I had someone asked me once how I got my homemade fries to actually look like fries. My secret isn’t really a secret. I have a French fry/Veggy cutter. I got it for Christmas and LOVE IT! These fries just can’t be beat. You are baking them, they are fresh, and the taste is amazing. I am thinking we may have to find a way to incorporate them into our menu again this week. Thank you for this great recipe Poker!! If you have any recipes you would like to have featured email me colie@colieskitchen.com

Ingredients

  • 2 tablespoons butter or margarine, melted
  • 1 tablespoon chili powder
  • 1 tablespoon honey
  • 1/4 teaspoon garlic powder
  • 1/4 teaspoon ground pepper
  • 2 lbs medium red potatoes, quartered
Directions

  1. Preheat oven 400°F.
  2. In large bowl, combine, chili powder, honey, garlic powder, pepper and butter.
  3. Add potatoes; toss to coat.
  4. Spoon potatoes in greased 11x7-inch baking dish.
  5. Bake 40-50 minutes maybe even longer if you want them crispy or until potatoes are tender. 


Bookmark and Share

Jun 24, 2010

One of my favorite guilty pleasures is sautéed mushrooms. I love the flavor, and I love them with anything. The is the ultimate recipe. They come out so tender, and with amazing flavor. You can’t go wrong serving these with just about anything.


Ingredients
  • 1/4 cup butter or margarine, melted
  • 2 -13.25 ounce cans of pieces and stems mushrooms
  • 1/4 cup dry white wine
  • 1/4 teaspoon salt
  • 1/8 teaspoon pepper
  • 1/8 teaspoon garlic powder
Directions
Simple! In a sautee pan add all the ingredients and stir everything together. Cook, uncovered, over low heat 30 minutes or until mushrooms are tender.


Bookmark and Share

Jun 23, 2010

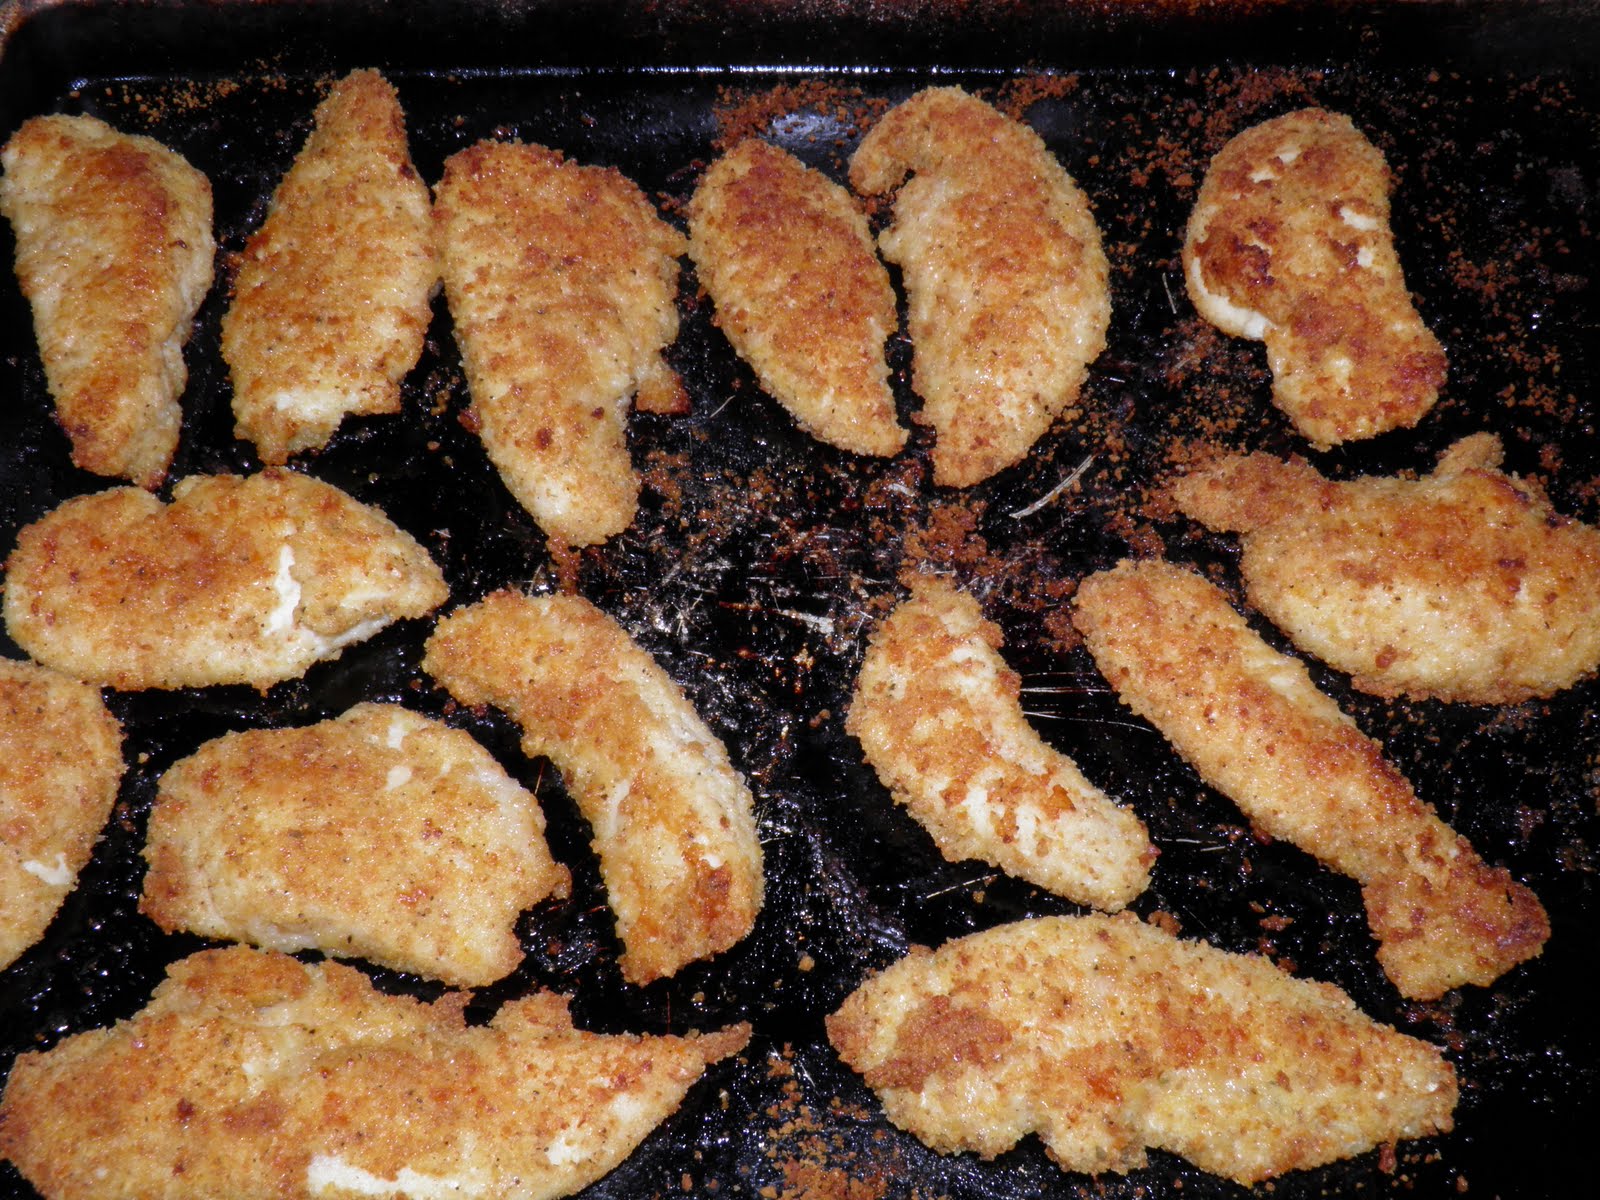
The name of this chicken says it all. A word of caution this shouldn’t be a first date recipe. It’s very garlicky, but if you like garlic you will love this recipe. To cut down on the garlic taste you could leave out the fresh garlic, but I think you would be doing this recipe injustice. When I made this, my family had no idea it was baked not fried. The first thing I heard was wow this fried chicken is good. Nope not fired. The flavor is amazing, and the crispiness leads you to believe this is fried chicken. I love this recipe because it’s something that could be very versatile. I think the breadcrumbs; with the cornbread, crumbs are what give it the extra crunch.

SERVES 4 (change servings and units)


Ingredients

  • 1/3 cup butter, melted
  • 2 tablespoons minced garlic
  • 2 teaspoons garlic powder
  • 1/2 teaspoon seasoning salt
  • 1/2 teaspoon onion powder
  • 1/2 cup seasoned dry bread crumb
  • 1/2 cup seasoned cornbread dry bread crumb
  • 1/2 cup finely grated mozzarella cheese
  • 1/4 cup freshly grated parmesan cheese
  • 1/2 teaspoon ground black pepper
  • 4 boneless skinless chicken breasts cut into strips

Directions

  1. Preheat oven to 350°F. 
  2. Spray a jelly roll pan with cooking spray
  3. In a bowl a food processor combine fresh minced garlic, garlic powder, bread crumbs, season salt,  onion powder, pepper, both cheeses, and process until well mixed.
  4. In a large bowl place the dry breadcrumb mixture out of the food processr.
  5. Melt butter , then dip chicken in butter mixture; then in crumb mixture, and repeat until all the chicken is breaded.
  6. Place in prepared pan and bake uncovered for 30-45 minutes turning the chicken every 15 minutes or until cooked through.
 

Bookmark and Share

Jun 15, 2010


This recipe is great. Not only is it much easier than making refried beans from scratch, but the flavor is just as good, if not better. Most restaurants that serve refried beans serve them dried out and tasteless, some even have a chalky taste. Yuck! 

With this recipe I took a few recipes that were OK, and put them altogether to get this one. They turned out so good! My husband freaked over them, and to be honest so did I!

Ingredients:
  • 19.75oz (or similar size) can whole pinto beans (Drained)
  • 1/4lb bacon
  • 2 cloves of garlic
  • ½ onions chopped
  • ½ cup chicken broth
Directions:
1.      Cut your bacon up into ¼-inch slices. Fry until crispy.
2.     Remove Bacon and dry on a paper towel while leaving the bacon drippings in the pan.
3.     To the drippings, add onion, and the garlic. Cook until tender and translucent.
4.     Remove 1 cup of beans from the can and leave them in reserve.
5.     Take remaining beans and mash them in the pan of onion and garlic. Mix it all together, and Add Chicken Broth. Stir ingredients well.
6.     Add remaining beans and mix all together.
7.     Add the cooked bacon back to the pot. Cook until bacon is no longer crisp, but tender.
8.     If needed add additional Chicken Broth to the beans.

Enjoy!

Print Friendly and PDF
Check Out Our Online Recipe Book: www.CafeChatterbox.com

Jun 12, 2010


One of my big pet peeves during the summer is heating up the entire house to make dinner. A Texas summer is just one you don’t want to tackle and you surely don’t want to heat up the house while doing so. Besides using old faithful or the Crockpot whatever you want to call it my other fall back in a nice chef salad. I tend to have a ton of stuff to go in the salads to make everyone happy. I set everything up so that everyone can make the salad the way they want it. It’s your salad do whatever makes you happy. Here’s what I add… soooo good!!


Ingredients:
  • Lettuce mix of romaine and iceberg
  • Mushrooms
  • Carrot shavings
  • Avocado
  • Tomatoes
  • Cucumber
  • Celery
  • Green olives
  • Black olives
  • Boiled eggs
  • Chicken chunks
  • Ham chunks
  • Cheddar cheese chunks
  • Mozzarella cheese chunks
  • Parmesan cheese
  • Croutons
  • Bacon bits
  • Dressings 

Jun 11, 2010

Thinking about dinner this night makes me laugh because this recipe is a tongue tricker. Your tongue is literally confused. Is it tasting nachos, tacos, pasta, Italian, Mexican… what the heck is it. The answer is “yes” to all of the above. The verdict from the family came back as surprisingly good. I don’t think anyone had any confidence in this dish, including me. Tacos in pasta shells? How could your tongue not be confused my brain is confused thinking about it. It really is good. You can use a traditional quick and easy taco meat like 1lb of cooked ground beef with a packet of taco seasoning, or you can do what I did, and take some frozen taco meat out of the freezer and use that. Excellent! You have you cheesy crunchy topping, you yummy flavorful shell, and a true delight to your pallet.


Ingredients
  • 1 lb ground beef  (I used Family Tradition Taco's )
  • 1 envelope taco seasoning 
  • 4 ounce cottage cheese or cream cheese (I used cottage)
  • 12 large pasta shells
  • 1 cup salsa (I used Pace Mild)
  • 1 cup enchilada sauce (I used old El Paso Mild)
  • 1 cup shredded cheddar cheese
  • 1 cup shredded monterey jack cheese
  • 1 1/2 cups crushed tortilla chips
Directions

  • Cook Beeff
  • Add taco seasoning and prepare according to package directions
  • Add cottage cheese
  • Pour salsa on the bottom of a greased 9x13inch pan
  • While the meat is cooking cook the pasta according to the directions on the box
  • Fill each shell 
  • Place in the bottom of the pan and top with taco sauce
  • Cover with foil and bake at 350 degrees for 30 minutes
  • Uncover and sprinkle with chips then cheese
  • Back 15 additional minutes
  • Serve hot


Bookmark and Share

Jun 10, 2010


(Pleae disregard the Sponge Bob Square Pants plate :-))

Sloppy Joes has to be my least favorite meal. I loved them when I was a kid and requested them every chance I got. Then suddenly the idea of eating on was just the worst thing you could ask of me. I never really got over that. 

My family on the other hand just loves them. I decided to think outside of the can and make them from scratch. To be honest with you they turned out really good. My family raved about them, and said they were far superior to anything out of a can. This will be on our keeper list. Thank you Jude for this great recipe. 

Ingredients
  • 1 lb. ground beef
  • 2 stalks celery, chopped
  • 1 small onion, chopped
  • 1 (8 ounce) can tomato sauce
  • 1/4 cup ketchup
  • 1/4 cup barbecue sauce
  • 1 tablespoon firmly packed brown sugar
  • 1 teaspoon dry mustard
  • salt and pepper to taste
  • 1 tablespoon Worcestershire sauce
  • 1 tablespoon vinegar
Directions:
  1. In a large skillet brown ground beef until it's no longer pink, then drain the grease. 
  2. Add celery and onion and cook until these vegetables are tender.
  3. Stir in remaining ingredients, simmer covered, 15-20 minutes, stirring occasionally.
  4. Cook until it's the consistency you like for serving on toasted buns


Print Friendly and PDF
Check Out Our Online Recipe Book: www.CafeChatterbox.com

Blue Star Applicances and Ranges

Enter your email address:

Delivered by FeedBurner

Popular Posts

Blog Archive