Mar 31, 2010


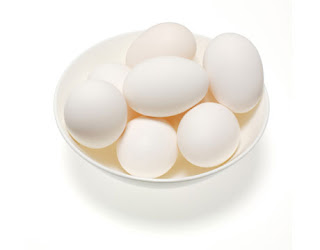
This is a great alternative to your store bought egg dye. Not only is less expensive, but typically it produces much more vibrant Easter eggs. Thank you MommyMakes for the great recipe.

Ingredients:
  • 10 drops food coloring (per color)
  • 1 teaspoon white vinegar  (per color)
  • 1/2 cup boiling water  (per color)

Directions:
  1. For each dye bath combine 1/2 cup boiling water with 1 tsp vinegar and 10 drops of food coloring in a bowl. Start with 5 drops red and 5 drops yellow, for orange for example, or 6 drops blue and 4 drops green for turquoise.
  2. Dip hard-cooked eggs in dye bath for 3-5 minutes, extend time for richer color. Try using tongs to dip only half an egg in one color, then dip other half in a different color.
  3. Use tongs or a slotted spoon to remove eggs and place on wax paper to dry, blot any excess with a paper towel.
  4. If you plan to eat your Easter eggs, never leave them unrefrigerated at any point for more than 2 hours.


This recipe is divine! I made half a recipe because I didn't want to take a chance that the recipe wouldn't be good, and for fear it would go to waste. I should have made the entire recipe. This is soooo good. It reminds me of Applebee's recipe for Spinach Artichoke Dip. The recipe below is the full recipe.

A big thank you goes out to one of our readers Angela for sending us this great recipes.

Ingredients:

  • 2 cups grated parmesan cheese (fresh or out of a can)
  • 2 cups grated mozzarella cheese
  • 1 (10 ounce) box frozen finely chopped spinach, thawed
  • 1 (14 ounce) can artichoke hearts, drained and chopped
  • 2/3 cup sour cream (room temperature)
  • 1 cup cream cheese (room temperature)
  • 1/3 cup mayonnaise (room temperature)
  • 2 teaspoons garlic, minced
Directions:

  1. Preheat oven to 375°F.
  2. Mix together Parmesan cheese, mozzarella cheese, spinach, and artichoke hearts.
  3. Combine remaining ingredients and mix with spinach mixture.
  4. Bake for 20-30 minutes.
  5. Serve with crackers, chips or toasted bread.

Print Friendly and PDF
Check Out Our Online Recipe Book: www.CafeChatterbox.com

Mar 30, 2010


After reading My Vintage Kitchen's post Tutorial: Make Your Own Veggie Broth in the Crock-Pot I had an apifany! For all these years I have been throwing out all my veggy scraps when I could have been savings them, recycling them, and making free stuff out of them. FREE? OH I love free!! It only took me a week to have a zip bag full of veggy scraps in my freezer. You name it I had it in the bag.. a ton of garlic and onion skins and some pieces. Asparagus and bell pepper pieces, oh yeah and green onion ends too. The bag was just full of veggy "trash!" A few nights ago we had a roasted chicken for dinner, and I knew it was time to make my chicken broth.


I had a large chicken so I knew it was never going to fit in my crockpot.I ended up cooking my broth in a large stock pot instead. I decided to add some flavor by sauteing the vegetables pieces first. The pot looked like something I would normally be putting down the garbage disposal.


Once they were a nice dark color I added the chicken and filled the pot with water leaving about 2 inches from the top of the pot. 


I brought the water to a boil, then dropped my temperature down to medium/low. I put the lid on the pot and let it simmer for around 8 hours, then it was ready.


I ended up with 28 cups of broth that I split up into 14 bags (2 cups each) that are now residing in my freezer. That's 14 cans of broth for free!! I only had to pay for the freezer bags which cost $1.99
I figure I saved a minium of $12.
Please visit My Vintage Kitchen you will be so happy you did. I know I am!!


Bookmark and Share

Mar 25, 2010

I got this "recipe" maybe I should say technique from Kittencal. I do not like eggs, but what I dislike more than eggs is having to peel them. It never peels correctly for me! I end up with a big mess and half my egg ends up in the sink. Here Kittencal gives us the perfect way to cook an easy peel egg just in time for Easter!! Thanks Kitten!!


Ingredients

  • 6 large eggs (or you may increase)
  • 2 teaspoons white vinegar
  • 1 pinch salt
  • water, to cover
  • 3 cups ice cubes (or use as much as desired)
Directions

  1. Place the eggs in a saucepan.
  2. Cover the eggs with lukewarm water.
  3. Add in vinegar and pinch salt.
  4. Bring to a full boil over medium heat; boil for 2 minutes (start timing after the water reaches a full boil).
  5. Remove from heat cover with a tight lid.
  6. Allow the eggs to stand for 11 minutes.
  7. Drain the eggs a couple times under very cold water.
  8. Cover the eggs with cold water then add in some ice.
  9. Allow the eggs to sit in ice water for about 3 minutes.
  10. Drain and peel.


Bookmark and Share

Mar 22, 2010

This is a Paula Deen Recipe. It's very easy and the crockpot does most of the work. My family really liked it. As for myself I thought it needed a little more wow, but that is the Cajun blood coming out in me. You could probably add a little fire with a little cayenne pepper or Tabasco.

Ingredients:

  • 2 tablespoon olive oil
  • 1/2 cup diced green bell peppers
  • 1/2 cup diced onions
  • 1/2 cup diced celery
  • 1 teaspoon chili powder
  • 1 (14-ounce) can tomatoes
  • 1 (8-ounce) can tomato sauce
  • 1 tablespoon hot sauce
  • 1 tablespoon Worcestershire sauce
  • 1 teaspoon white sugar
  • salt and pepper to taste
  • 1 1/2 lb peeled and deveined shrimp
  • green onions for garnish
  • cooked rice

Directions:
 
  1. Preheat crock pot on high.
  2. In fry pan, heat olive oil. Add peppers, onions and celery. Cook until softened.
  3. Add chili powder and saute until caramelized. Remove from heat and pour into crock pot.
  4. Add tomatoes, tomato sauce, hot sauce, Worcestershire, white sugar, salt and pepper.
  5. Cook for 3 hours.
  6. Add shrimp and cook for about 3 minutes.
  7. Serve over rice. Top with chopped green onions.

Servings: 8 servings
Prep Time: 5 min
Cook Time: 3 hours 10 min
Difficulty: Easy

For more of my recipes visit my virtual recipe book: http://www.coliesrecipes.info/


Bookmark and Share

Mar 21, 2010


I modified the recipe based on what I had in the house, and I halfed it because we couldn't eat an entire recipe. The shells turned out amazing. The flavor was excellent. It was pretty easy and turned out great! You could make the entire recipe and freeze half for a future meal.

Note: This recipe needs to be made 24 hours in advance! I didn’t realize that information and went to make dinner and realized I was too late. I ended up making it then we had it the next night for dinner! Well worth the wait!

(Yields 16 shells)

Ingredients:
  • 1/2 block of cream cheese (room temp)
  • 1 cups mozzarella cheese
  • 1/4 cup whole milk feta cheese
  • 1/4 cup cheddar cheese
  • 1 egg
  • 16 large pasta shells
  • 3 Tbsp. minced garlic
  • Pepper to taste
  • Jar Spaghetti Sauce
Directions:
  1. Mix together cheeses, egg, garlic and pepper well. (I used a Kitchenaid Mixer)
  2. Add the cheese mixture to a large zip bag
  3. Cut a corner off the zip bag and use the bag to pipe the cheese mixture into each un-cooked shell
  4. Arrange the shells in a baking dish
  5. Pour sauce over shells and refrigerate over night
  6. When you are ready to cook pre-heat oven to 350 degrees and bake for 30 minutes.
Original Recipe Source

Print Friendly and PDF
Check Out Our Online Recipe Book: www.CafeChatterbox.com

Mar 20, 2010


Ingredients

  • 1 lb cook spaghetti, or angel hair pasta
  • 1 lb raw shrimp, peeled and deveined 
  • 3/4 cup white wine 
  • 1 stick +2 tablespoons unsalted butter
  • 3 tablespoons minced garlic 
  • 1/4 teaspoon paprika 
  • 1/2 tablespoon fresh parsley flakes 
  • 1 tablespoon lemon juice 
  • 1 pinch red pepper flakes
  • salt (To taste)
  • Grated parmesan cheese (To taste)

Directions

  1. Heat white wine, olive oil, butter, and garlic in a large skillet on medium heat until it just starts to boil.
  2. Add paprika, red pepper flakes, and parsley flakes cook for five minutes
  3. Stir in shrimp.
  4. Cook for about 4 or 5 minutes or until shrimp turns pink.
  5. Add pasta to a plate, then spoon Shrimp Scampi onto the pasta. Add parmesan cheese to your taste.


For more of my recipes visit my virtual recipe book: http://www.coliesrecipes.info/


Bookmark and Share

Mar 19, 2010

I love this recipe because not only does it taste like Grannies country green beans, but it's so quick and easy! Thank you Grannie for inspiring this recipe.


Ingredients:
  • 1 can of green beans drained
  • 1/2 onion sliced
  • 1TBS of real bacon bits (not Bacos)
  • 2 TBS margarine
Directions:

  1. Slice onion and add them to a pot with margarine and bacon bits.
  2. Cook until onions are tender and starting to glaze
  3. Add a can of drained green beans and mix in
  4. Cook until green beans are heated through
  5. Enjoy! :-)
For more of my recipes visit my virtual recipe book: http://www.coliesrecipes.info/


Bookmark and Share

Mar 18, 2010


Ingredients

  • 1 lb asparagus
  • 1 1/2 tablespoons olive oil
  • 1/2 teaspoon kosher salt (or 1/4 teaspoon regular table salt)
Directions

  1. Preheat oven to 425°F.
  2. Cut off the woody bottom part of the asparagus spears and discard.
  3. With a vegetable peeler, peel off the skin on the bottom 2-3 inches of the spears (this keeps the asparagus from being all "stringy" and if you eat asparagus you know what I mean by that).
  4. Place asparagus on foil-lined baking sheet and drizzle with olive oil.
  5. Sprinkle with salt. With your hands, roll the asparagus around until they are evenly coated with oil and salt.
  6. Roast for 10-15 minutes, depending on the thickness of your stalks and how tender you like them.
  7. They should be tender when pierced with the tip of a knife.
  8. The tips of the spears will get very brown but watch them to prevent burning.
  9. They are great plain, but sometimes I serve them with a light vinaigrette if we need something acidic to balance out our meal.
For more of my recipes visit my virtual recipe book: http://www.coliesrecipes.info/


Bookmark and Share

Mar 17, 2010


Ingredients:
  • 3 cups uncooked Pasta
  • 6 large cloves of garlic minced
  • 2-3 bunches of green onions sliced in 1/8 inch slices or smaller
  • 4 tbs margarine
  • 1 lb of asparagus.
  • Parmesan cheese

 Directions

  1. In a large pot, cook your pasta according to the package directions (al dente). Set aside
  2. Wash asparagus well then cut into one-inch pieces. Woody ends need to be removed or filed down
  3. Place asparagus in a pot with enough water to cover. Steam the asparagus for 10-20 minutes until all the pieces are tender. Set aside
  4. In a Dutch over or a large pot place sliced green onions, minced garlic and margarine. Sauté until tender, but not browned.
  5. In the Dutch oven or pot with the sautéed, green onions and garlic add the cooked pasta and asparagus.
  6. Liberally add parmesan cheese to cover all the ingredients ( I add a lot ... more makes this recipe better)
  7. Heat through and serve.
For more of my recipes visit my virtual recipe book: http://www.coliesrecipes.info/


Bookmark and Share

Mar 16, 2010


I found this recipe in Family Circle Magazine. It's soooo quick and easy! It would make a great OAMC recipe or a freezer recipe for a quick dinner.

Ingredients:

  • 1-1/2 pounds cooked boneless chicken
  • 1 package (2 1/2 pounds) frozen bean and cheese burritos
  • 1 cup milk
  • 1 can (10 3/4 ounces) cream of mushroom soup
  • 1-1/2 cups of shredded cheese
  • 1/2 cup sliced black olives
Directions:

  1. Heat oven to 350 degrees
  2. Coat a 13x9x2 baking dish with non-stick spray
  3. Add burritos cutting to fit in a tight single layer
  4. Scatter the chicken over the burritos
  5. In a medium size bowl, mix together milk, soup, 1 cup of the cheese, and the olives
  6. Pour mixture evenly over the chicken and the burritos
  7. Top with remaining 1/2 cup of cheese
  8. Bake at 350 degrees for 30 mins
For more of my recipes visit my virtual recipe book: http://www.coliesrecipes.info/


Bookmark and Share


Ingredients:
  • 4 Boneless Chicken breast
  • 6TBS Margerine Divided
  • 1TBS Vegetable Oil
  • 3 Large Garlic Cloves
  • 1 tsp Thyme
  • 1 Can Chicken Broth
  • 1/2tsp Salt
  • 1/8tsp Pepper
  • 1/2 Cup White Wine
  • 1 Large Can Mushroom pieces Drained
Directions:
  1. In a large pot boil 3 whole Large Garlic Cloves for 10mins remove from water and add to frying pan.
  2. In that same frying pan melt 2TBS of margerine then add Salt, Pepper, Thyme, and mix together, then add chicken.
  3. Cover and cook chicken for 20-30mins or until chicken is cooked through, turn as needed.
  4. After the chicken is cooked remove chicken from frying pan, and set aside DO NOT drain remaining ingredients in the pan. Add wine, and drained can of mushroom pieces to the frying pan. Reduce by half.
  5. Add chicken broth. Reduce stock to 3/4 by boiling.
  6. Remove from heat and add remaining margerine, and chicken, add a little flour if needed to thicken gravy.
  7. Cook for 5 more minutes to warm the chicken and serve the gravy over chicken or mashed potatoes.

For more of my recipes visit my virtual recipe book: http://www.coliesrecipes.info/


Bookmark and Share

Mar 13, 2010


This recipe is sooo good and so juicy. It's easy (for the most part) to make. I ran into issues getting the fried onions to stay on the chicken, but in the end the chicken came out great!! Also I used an entire large can on three large pieces. I would recommend watching your cooking time. It will vary depending on the size on your chicken pieces. I had three large breast and they were ready in exactly 20 minutes, but I think my oven cooks faster than it should.

Ingredients:

  • 2 cups (4 oz.) FRENCH'S Original or Cheddar French Fried Onions
  • 2 tbsp. all-purpose flour
  • 4 (5 oz.) boneless skinless chicken breasts
  • 1 egg, beaten
Directions:

  1. Place French Fried Onions and flour into plastic bag. Lightly crush with hands or with rolling pin. Transfer to pie plate or waxed paper.
  2. Dip chicken into egg; then coat with onion crumbs, pressing firmly to adhere. Place chicken on baking sheet.
  3. Bake at 400 degrees for 20 min. or until no longer pink in center.


Bookmark and Share

Blue Star Applicances and Ranges

Enter your email address:

Delivered by FeedBurner

Popular Posts

Blog Archive